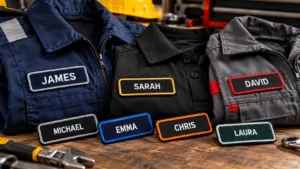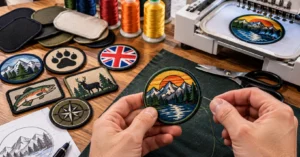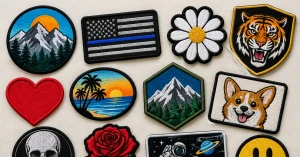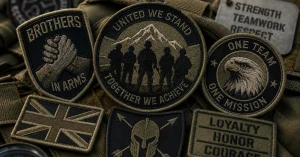
Have you ever looked at an embroidered patch on a jacket, cap, uniform, backpack, or work shirt and wondered, “Can I make my own embroidery patches?”
The short answer is yes.
With the right materials, an embroidery machine, suitable software, patience, and some practice, you can make embroidered patches yourself. You can even experiment with different fabrics, thread colours, shapes, borders, and backing options to create something completely personal.
However, making an embroidered patch is not quite as simple as printing a picture and cutting it out.
An embroidered patch has to be designed around the limitations of stitching. Very small lettering, extremely fine details, complicated colour combinations, and intricate artwork may not translate perfectly from a screen into thread. The design normally needs to be prepared and digitised so an embroidery machine knows exactly where, how, and in what sequence to stitch.
That is why there is a difference between designing your own patch and producing a professional embroidered patch.
At Custom Patch Makers UK, we help turn logos, artwork, names, symbols, illustrations, club designs, business branding, and other ideas into custom patches. Whether you are experimenting with DIY embroidery or deciding whether professional patch production is more suitable, understanding the process can help you make a better decision.
In this guide, we will explain:
- Whether you can make embroidered patches at home
- What equipment you need
- How to design an embroidered patch
- Which fabrics work best
- Why stabiliser matters
- What embroidery digitising means
- How to stitch a patch
- How to create a clean border
- Which backing options you can use
- Common DIY mistakes
- How much homemade patches can cost
- When professional patch manufacturing makes more sense
- How to prepare artwork for custom patch production
- Frequently asked questions about making embroidery patches
Let’s start with the basics.
Can You Really Make Your Own Embroidery Patches?
Yes, you can.
There are several ways to make an embroidered patch, depending on the equipment and finish you want.
You can create patches using:
- Hand embroidery
- A domestic embroidery machine
- A sewing machine with suitable techniques
- A professional embroidery machine
- A custom patch manufacturer
The first four approaches allow you to make patches yourself, although the results, production speed, level of detail, and consistency can vary considerably.
For a hobby project, making one or two patches at home can be an enjoyable creative activity.
For example, you might want to make:
- A personalised jacket patch
- A name patch
- A club badge
- A small logo patch
- A gaming patch
- A hobby badge
- A backpack patch
- A decorative fashion patch
- A gift for a friend
DIY embroidery can be particularly useful when you want to experiment with your own designs.
However, if you need dozens or hundreds of identical patches, the situation changes. Producing every patch yourself requires considerable time, materials, machine access, and quality control.
A professional manufacturer can produce repeated designs with much greater consistency.
The important question is therefore not simply “Can I make my own embroidery patches?”
It is:
“Is making them myself the right option for the number, quality, complexity, and purpose of my patches?”
What Do You Need to Make Embroidered Patches?
Before starting your first patch, you need to understand the basic equipment.
The exact requirements depend on your chosen production method, but a typical machine-embroidered patch project may require:
- Patch artwork
- Embroidery machine
- Embroidery thread
- Suitable base fabric
- Stabiliser
- Embroidery hoop
- Embroidery needles
- Bobbin thread
- Digitised embroidery file
- Sharp scissors
- Patch backing material
- Heat press or iron if using heat-applied backing
You may also need embroidery digitising software if you are creating the stitch file yourself.
1. Patch Artwork
Everything starts with the design.
Your artwork might be:
- A company logo
- A club emblem
- A drawing
- A name
- A mascot
- A symbol
- A slogan
- A badge
- An illustration
A digital file is useful because it can be adjusted before production.
Common artwork formats may include PNG, JPG, PDF, SVG, AI, or other vector/raster formats depending on the workflow.
Remember that an image that looks excellent on a computer monitor may require changes before it becomes embroidery.
Embroidery uses thread rather than pixels.
That distinction is important.
2. Embroidery Machine
An embroidery machine physically stitches the design.
For occasional home projects, a domestic embroidery machine may be enough.
For larger production, commercial machines are designed to operate more efficiently and consistently.
A machine’s capabilities can affect:
- Maximum design size
- Number of needles
- Thread changes
- Stitch speed
- Hoop size
- Production capacity
- Design complexity
If you are only making patches as a hobby, investing in an expensive commercial machine may not be practical.
3. Embroidery Thread
Thread is one of the most visible elements of your finished patch.
Different thread colours allow you to reproduce the main elements of your artwork.
You should think about contrast carefully.
For example, light-coloured lettering on a dark patch base is generally easier to read than a colour combination with very little contrast.
The number of thread colours can also influence production time and complexity.
A simple two- or three-colour patch can often be easier to manage than a highly detailed design containing numerous colours.
4. Patch Fabric
The base fabric supports the embroidery.
Common choices include:
- Twill
- Felt
- Canvas
- Denim
- Cotton
- Other suitable textiles
Twill is widely used for embroidered patches because it provides a relatively stable surface for stitching.
The appropriate material depends on the appearance and application you want.
A fashion patch may have different requirements from a patch intended for workwear, uniforms, outdoor clothing, or bags.
5. Stabiliser
Stabiliser helps support the fabric while the embroidery machine is stitching.
Without adequate stabilisation, fabric can move, stretch, bunch, or distort.
This can result in:
- Uneven lettering
- Misaligned stitching
- Wrinkles
- Distorted shapes
- Poor registration
- An untidy appearance
Choosing the correct stabiliser and using it properly is therefore an important part of the process.
Can You Make Embroidery Patches Without an Embroidery Machine?
Yes, but your options are more limited.
Hand Embroidery
Hand embroidery allows you to create patches without owning an embroidery machine.
You can draw a design onto suitable fabric and stitch it manually using embroidery thread.
This can be a great option for:
- Small decorative patches
- Craft projects
- Personal artwork
- One-off designs
- Handmade gifts
The main disadvantage is time.
A detailed patch that takes an embroidery machine only a few minutes to stitch could take considerably longer by hand.
Consistency can also be more difficult when producing multiple identical patches.
Using a Regular Sewing Machine
Some people experiment with ordinary sewing machines to create embroidered designs.
This can work for simple shapes and creative projects, but it does not necessarily provide the same control as a dedicated embroidery machine.
A regular sewing machine is primarily designed for sewing rather than automatically following a digitised embroidery pattern.
If you want repeatable, detailed embroidered patches, a dedicated embroidery machine is generally more appropriate.
How Do You Design Your Own Embroidery Patch?
Designing the artwork is one of the most important stages.
Before worrying about thread or fabric, think about what you want your finished patch to communicate.
Ask yourself:
- What is the patch for?
- Where will it be attached?
- How large should it be?
- Does it need text?
- How many colours are necessary?
- Does the artwork need to be readable from a distance?
- Will the patch be washed regularly?
- Does the design need to match existing branding?
Keep Small Patches Simple
One of the biggest mistakes beginners make is trying to fit too much information into a small patch.
Imagine trying to embroider:
- A detailed illustration
- Several lines of text
- Multiple tiny symbols
- Ten different colours
- Fine decorative borders
onto a very small patch.
The computer image might look impressive.
The embroidery may not.
Thread has physical thickness, which means tiny details can merge together.
For this reason, simplify your design wherever possible.
Make Text Easy to Read
Text is particularly sensitive to patch size.
Small fonts, thin strokes, complicated lettering, and decorative scripts can become difficult to reproduce clearly.
For name patches and logo patches, simple lettering is often easier to embroider successfully.
Consider:
- Font thickness
- Letter height
- Spacing
- Contrast
- Patch size
- Number of words
If the text is important, make sure there is enough room for it.
What Is Embroidery Digitising?
If you are new to embroidered patches, digitising is one of the most important terms to understand.
An ordinary image file does not automatically tell an embroidery machine how to stitch.
Digitising converts artwork into an embroidery file containing information about the stitch process.
The digitised file can determine things such as:
- Stitch direction
- Stitch type
- Stitch density
- Stitch sequence
- Thread changes
- Underlay
- Satin stitching
- Fill areas
- Borders
- Design positioning
In simple terms, digitising translates an image into instructions that an embroidery machine can understand.
This is why simply uploading a JPG to an embroidery machine is not enough.
A proper embroidery file must be prepared.
Why Good Digitising Matters
Poor digitising can create problems even when the original artwork looks excellent.
For example, incorrect settings may result in:
- Excessive thread density
- Gaps between stitches
- Uneven lettering
- Puckering
- Poor registration
- Weak borders
- Distorted shapes
Professional patch production therefore involves much more than pressing a button on an embroidery machine.
The design has to be prepared for the physical realities of embroidery.
How to Make Your Own Embroidery Patches: Step-by-Step
Now let’s look at a typical DIY process.
Step 1: Create or Choose Your Artwork
Start with your design.
If you are drawing from scratch, begin with a simple concept.
If you already have a company logo, club emblem, illustration, or other artwork, make sure you have a high-quality version available.
A clean source file gives you more flexibility when preparing the embroidery.
Step 2: Decide on the Patch Size
Think about where the patch will be used.
A patch for a cap may need to be smaller than one intended for the back of a jacket.
Measure the available area before finalising your design.
Consider:
- Width
- Height
- Shape
- Placement
- Text size
- Border thickness
Do not design everything first and only think about the final dimensions afterward.
The physical size affects what can realistically be embroidered.
Step 3: Simplify the Artwork
Remove unnecessary details.
Look closely at your design and ask:
Does every element need to be embroidered?
If not, consider simplifying it.
You might remove:
- Tiny decorative lines
- Extremely small text
- Unnecessary background details
- Very thin outlines
- Overlapping elements
Simplification can improve readability and reduce production complexity.
Step 4: Select the Base Fabric
Choose your patch material.
Twill is a popular option for many embroidered designs because it provides a stable foundation.
Other materials may be appropriate depending on the intended appearance.
Think about:
- Durability
- Texture
- Colour
- Flexibility
- Garment type
- Intended use
Step 5: Add Stabiliser
Secure the fabric and stabiliser correctly.
The stabiliser helps prevent movement during stitching.
Make sure the fabric is positioned properly inside the hoop and does not become unnecessarily loose or distorted.
Step 6: Prepare the Embroidery File
Convert your artwork into a suitable embroidery format.
The exact file type depends on your embroidery machine.
This is also the stage where stitch settings are established.
If you are new to embroidery digitising, learning this part can take considerable time.
Step 7: Load Your Machine
Set up the appropriate:
- Needle
- Thread
- Bobbin
- Hoop
- Fabric
- Stabiliser
- Embroidery file
Double-check the design placement before starting.
Step 8: Stitch a Test
A test stitch-out can save you from wasting material.
This is particularly important if the design contains:
- Small lettering
- Multiple colours
- Detailed artwork
- Complex borders
- High stitch density
A test allows you to identify problems before making a larger batch.
Step 9: Complete the Embroidery
Once you are satisfied with the test, stitch the final patch.
Keep an eye on the machine.
Watch for:
- Thread breaks
- Needle problems
- Fabric movement
- Thread bunching
- Design misalignment
Do not assume every production run will be perfect automatically.
Step 10: Remove Excess Fabric
After embroidery is complete, carefully remove the patch from the hoop.
Trim the excess material around the design.
Use sharp scissors so you can work close to the border without accidentally cutting the embroidery.
Step 11: Finish the Edge
The edge is an important part of the final appearance.
A patch may use an embroidered border or another edge-finishing technique.
The border helps define the shape and gives the patch a finished appearance.
Popular patch shapes include:
- Circle
- Rectangle
- Square
- Shield
- Oval
- Custom logo shape
- Name strip
- Irregular outline
Step 12: Choose the Backing
Finally, choose how the patch will be attached.
Common options include:
- Sew-on backing
- Iron-on backing
- Hook and loop backing
- Adhesive backing
- Other specialised backing solutions
The correct option depends on the garment and intended use.
Which Patch Backing Should You Choose?
Sew-On Backing
Sew-on patches are attached directly to the garment using thread.
They are a popular option when durability is important.
Sew-on backing can be suitable for:
- Jackets
- Workwear
- Bags
- Uniforms
- Heavy-use clothing
- Outdoor garments
If a patch will experience frequent washing or demanding use, sewing can provide a secure attachment.
Iron-On Backing
Iron-on patches use heat to activate adhesive on the reverse side.
They are convenient because the patch can be attached without immediately sewing around the entire edge.
They are commonly used for:
- Jackets
- Shirts
- Bags
- Casual clothing
- Fashion projects
However, the suitability of iron-on backing depends on the fabric and how the garment will be used.
For heavy-duty applications, additional sewing may sometimes provide greater security.
Hook and Loop / Velcro Backing
Hook-and-loop backing allows a patch to be removed and replaced.
This can be useful where identification needs to change regularly or where patches need to be transferred between garments or equipment.
Applications can include:
- Uniforms
- Tactical-style clothing
- Workwear
- Equipment bags
- Organisational apparel
What Are the Most Common DIY Embroidery Patch Mistakes?
Making your own patch can be rewarding, but beginners often encounter the same problems.
Mistake 1: Making the Design Too Detailed
More detail does not automatically mean a better patch.
Tiny elements can disappear when converted into stitches.
Solution: simplify the artwork before digitising.
Mistake 2: Using Very Small Text
Small lettering can become difficult to read.
Solution: increase text size or reduce the amount of wording.
Mistake 3: Choosing Poor Colour Contrast
Similar colours can blend together.
For example, dark blue thread on a black base may be difficult to distinguish.
Solution: use stronger contrast between the thread and background.
Mistake 4: Incorrect Stabilisation
Fabric movement can affect stitch quality.
Solution: choose suitable stabiliser and secure the fabric correctly.
Mistake 5: Too Much Stitch Density
Adding more stitches does not necessarily make a patch stronger or better.
Excessive stitching can contribute to:
- Puckering
- Stiffness
- Thread buildup
- Distortion
Solution: use appropriate digitising settings.
Mistake 6: Cutting Too Close to the Embroidery
If you trim too aggressively, you risk damaging the stitched border.
Solution: use sharp scissors and leave appropriate clearance.
Mistake 7: Skipping the Test Patch
A design may look perfect digitally but behave differently when stitched.
Solution: produce a test before making a large batch.
How Much Does It Cost to Make Your Own Embroidery Patches?
The answer depends on what equipment you already own.
If you already have an embroidery machine, the cost of producing an individual patch can be relatively low once the initial setup has been completed.
But if you are starting from zero, the equipment costs can add up.
You may need to purchase:
- Embroidery machine
- Digitising software
- Thread
- Needles
- Stabiliser
- Fabric
- Hoops
- Backing material
- Cutting tools
- Heat equipment
- Test materials
There is also the value of your time.
This is particularly important when comparing DIY production with professional custom patches.
Suppose you need 100 identical patches.
Making 100 patches yourself involves:
- Preparing the artwork
- Digitising
- Testing
- Loading materials
- Running the machine
- Monitoring production
- Trimming
- Finishing
- Applying backing
- Inspecting every patch
A professional manufacturer is set up specifically for this workflow.
That can make outsourcing more practical for larger quantities.
Is It Cheaper to Make Your Own Patches?
Sometimes.
For a hobbyist who already owns the equipment, DIY production may be economical.
For someone starting from scratch, however, purchasing equipment solely to produce a small number of patches may not be the most economical approach.
You should consider the total cost, not just the cost of fabric and thread.
For example:
DIY cost = equipment + materials + software + setup + labour/time + mistakes + maintenance
Professional production can instead provide a defined production service without requiring you to purchase and maintain embroidery equipment yourself.
The right choice depends on your circumstances.
DIY Embroidery Patches vs Professional Custom Patches
There is no single solution for everyone.
Making Your Own
DIY production may suit you if:
- You enjoy embroidery
- You want to experiment
- You only need a few patches
- You already own an embroidery machine
- You want to learn a new craft
- You enjoy creating handmade products
Professional Production
Professional production may be more suitable if:
- You need a larger quantity
- You require identical patches
- Your design is complicated
- You need professional finishing
- You are creating patches for a business
- You are producing merchandise
- You need consistent quality
- You do not own embroidery equipment
At Custom Patch Makers UK, we work with customers who need custom patch production without having to manage the entire embroidery process themselves.
What Types of Custom Embroidered Patches Can You Make?
One of the advantages of custom patches is flexibility.
Your design can represent almost anything.
Business Logo Patches
Businesses can use embroidered patches on:
- Staff uniforms
- Work jackets
- Caps
- Bags
- Promotional clothing
- Event merchandise
A consistent patch can help create a recognisable visual identity.
Sports Team Patches
Sports teams can use patches for:
- Team logos
- Player names
- Club badges
- Tournament identification
- Championship designs
- Supporter merchandise
Club and Organisation Patches
Clubs can create custom badges representing:
- Membership
- Activities
- Events
- Achievements
- Branches
- Special occasions
Fashion Patches
Custom embroidered patches can also become part of fashion products.
They can be applied to:
- Denim jackets
- Jeans
- Caps
- Hoodies
- Bags
- Shirts
- Streetwear
Personal Patches
You do not need to own a company or belong to a club to make a custom patch.
A patch can simply represent:
- Your name
- Favourite hobby
- Personal artwork
- Pet
- Phrase
- Symbol
- Interest
- Personal project
Can I Turn a Picture Into an Embroidered Patch?
Yes, many pictures can be converted into embroidered designs.
However, the image may need to be simplified.
Photographs and highly detailed illustrations contain many visual elements that can be difficult to reproduce accurately using thread.
A professional digitiser may simplify:
- Shadows
- Fine lines
- Backgrounds
- Tiny details
- Colour transitions
The goal is not necessarily to reproduce every pixel.
The goal is to create a stitchable design that communicates the important visual elements.
For embroidered patches, a simplified and well-balanced design can often produce a better result than trying to reproduce every tiny detail.
What File Should You Send for a Custom Patch?
If you are ordering professional custom patches, send the highest-quality artwork you have.
Useful formats can include:
- PNG
- JPG
- SVG
- AI
- Other high-resolution or vector artwork
If you only have a low-resolution image, do not automatically assume the project is impossible.
A patch maker may be able to work from the available artwork and prepare it for embroidery.
It is always useful to explain:
- Desired patch size
- Shape
- Quantity
- Colours
- Backing type
- Intended application
- Any important design requirements
How Large Should an Embroidered Patch Be?
There is no universal patch size.
The correct size depends on where you intend to use it.
For example:
Small patches can work well on caps, sleeves, pockets, and small accessories.
Medium patches can suit jackets, uniforms, bags, and workwear.
Large patches can be appropriate for the back or larger areas of garments.
The most important thing is to make sure the design remains readable and visually balanced at the final size.
If your design contains a lot of text, increasing the patch size may be necessary.
How Many Colours Should an Embroidered Patch Have?
There is no fixed maximum that applies to every design.
However, simplicity can make production easier.
A well-designed patch may look excellent using only two or three colours.
For example:
- Black + white
- Navy + white
- Red + white
- Green + gold
- Blue + yellow
More colours can certainly be used when the artwork requires them.
The important thing is that each colour contributes to the design rather than making the patch unnecessarily complicated.
Can Embroidered Patches Be Washed?
Yes, embroidered patches can generally be used on washable garments.
However, the durability of a patch depends on factors such as:
- Thread quality
- Fabric
- Stitching
- Border
- Backing
- Attachment method
- Washing conditions
- Garment material
Always consider the intended use when choosing the patch construction.
If a garment will be washed frequently, secure attachment becomes especially important.
Can You Make Patches for Hats and Caps?
Yes.
Custom embroidered patches can be used on many types of headwear.
They can add:
- Brand identity
- Club logos
- Personal designs
- Team badges
- Decorative artwork
However, curved surfaces such as caps can introduce additional design considerations.
The patch should be sized appropriately for the available space, and the attachment method should suit the cap material.
For larger or more complex designs, it is useful to discuss the application with your patch manufacturer before finalising the artwork.
Should I Make My Own Patches or Order Them?
Consider three questions.
How many do you need?
If you need one or two patches and already enjoy embroidery, DIY can be fun.
If you need 50, 100, 500, or more identical patches, professional production may save significant time.
How complicated is the design?
A simple symbol is easier to produce yourself.
A detailed logo with small text and multiple elements requires more advanced digitising and embroidery knowledge.
How important is consistency?
If every patch needs to look the same, professional production can make the process easier.
When patches represent a company, club, uniform, or product brand, consistency is especially important.
Why Choose Custom Patch Makers UK?
At Custom Patch Makers UK, we understand that every patch project starts with a different idea.
One customer may need a simple embroidered logo.
Another may need patches for an entire sports team.
A clothing brand may require custom patches for merchandise.
A club may want a membership badge.
A business may need branded workwear.
Our role is to help turn those ideas into finished custom patches.
Depending on your project, custom patches can be produced in different styles and materials, including:
- Embroidered patches
- Woven patches
- Chenille patches
- PVC patches
- Leather patches
- Printed patches
- Velcro patches
- Iron-on patches
- Sew-on patches
Choosing the correct patch type depends on your design and where the patch will be used.
If embroidery is not the best solution for your artwork, another patch material may provide better detail or durability.
How to Order Your Own Custom Embroidered Patches
The process can be straightforward.
1. Prepare Your Artwork
Send your logo, drawing, image, or concept.
Do not worry if your artwork is not already an embroidery file.
2. Tell Us Your Requirements
Provide:
- Size
- Quantity
- Shape
- Colours
- Backing preference
- Intended application
3. Review the Design
The artwork can be prepared for patch production.
This is the opportunity to check proportions, colours, text, and overall appearance.
4. Approve the Design
Once the design is approved, production can move forward.
5. Production
The approved design is converted into the appropriate production process and manufactured.
6. Quality Check
The completed patches can then be checked for issues such as:
- Stitching
- Shape
- Colour
- Border
- Backing
- Overall finish
The result is a batch of patches ready for use on clothing, uniforms, accessories, merchandise, or other suitable applications.
Frequently Asked Questions
Can I make my own embroidery patches at home?
Yes. You can create embroidered patches at home using hand embroidery, a domestic embroidery machine, or other suitable equipment. A machine-based process generally requires fabric, stabiliser, thread, embroidery software or a digitised file, and suitable finishing materials.
Do I need an embroidery machine to make patches?
No. You can make simple patches by hand. However, an embroidery machine is useful when you want consistent machine stitching or need to produce multiple copies of a design.
What fabric is best for embroidered patches?
Twill is a popular choice because it provides a stable surface for embroidery. Felt, canvas, denim, and other fabrics may also be suitable depending on the intended appearance and application.
What is embroidery digitising?
Embroidery digitising is the process of converting artwork into stitch instructions that an embroidery machine can follow. It determines elements such as stitch direction, density, sequence, and thread changes.
Can I make an embroidered patch from a PNG?
Yes. A PNG can be used as source artwork, but it normally needs to be converted into an embroidery-ready file before machine stitching.
Can I embroider small text onto a patch?
Yes, but extremely small lettering can become difficult to read. The final patch size, font, stitch settings, and thread thickness all affect readability.
Are homemade embroidery patches durable?
They can be, provided the correct materials, stitching, edge finishing, and backing are used. Durability also depends on how the patch is attached and how the garment is treated.
Is sew-on better than iron-on?
Neither option is automatically better for every situation. Iron-on backing offers convenience, while sew-on attachment can be useful for garments and applications requiring a more secure attachment. The appropriate choice depends on the material and intended use.
Can I make custom-shaped embroidered patches?
Yes. Embroidered patches can be produced in many shapes, including circles, rectangles, shields, letters, logos, and custom outlines.
Can I make patches for my business?
Absolutely. Businesses commonly use custom patches for uniforms, workwear, promotional products, caps, jackets, and branded merchandise.
Can you make patches from my existing logo?
Yes. Existing logos can be prepared for patch production. Depending on the artwork, some adjustments may be recommended so that important details remain clear when converted into embroidery.
What if my artwork is complicated?
A complicated design does not necessarily mean it cannot become a patch. It may simply need to be simplified or produced using a different patch method. Embroidery, woven, printed, and PVC patches each have different capabilities.
How many patches can I order?
The appropriate quantity depends on your project. Small orders can be useful for personal projects, while larger quantities may be suitable for clubs, businesses, events, brands, and organisations.
Final Thoughts: Can You Make Your Own Embroidery Patches?
So, can you make your own embroidery patches?
Yes.
If you enjoy crafting, have access to an embroidery machine, and are willing to learn about digitising and embroidery techniques, making your own patches can be a rewarding project.
You can experiment with colours, fabrics, shapes, lettering, borders, and backing methods until you develop a style that works for you.
But DIY production is not always the most practical choice.
If you need a large number of identical patches, want a highly detailed design, require consistent professional finishing, or simply do not want to invest in embroidery equipment, working with a professional patch manufacturer can save considerable time and effort.
The most important thing is to start with a design that has been created with embroidery in mind.
Keep important details visible.
Avoid unnecessarily tiny text.
Use suitable colour contrast.
Choose the correct patch material.
Think carefully about the backing.
And always consider where the finished patch will be used.
Whether you want to experiment with a single homemade patch or produce a larger collection for your business, club, team, clothing brand, or organisation, the right preparation can make a significant difference.
At Custom Patch Makers UK, we can help turn your artwork or idea into custom patches designed around your requirements. From embroidered and woven patches to PVC, chenille, leather, printed, iron-on, sew-on, and Velcro options, you can choose a patch style that fits your project.
If you already have your design, you can start by deciding three things:
What size do you need?
How many patches do you want?
How would you like the patches to attach to your clothing or equipment?
Once those details are clear, the rest of the process becomes much easier.
Your idea might begin as a simple logo, sketch, name, or symbol.
With the right preparation, it can become a finished patch that people can wear, display, collect, and use for years.