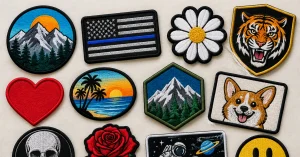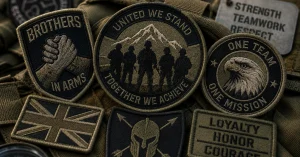
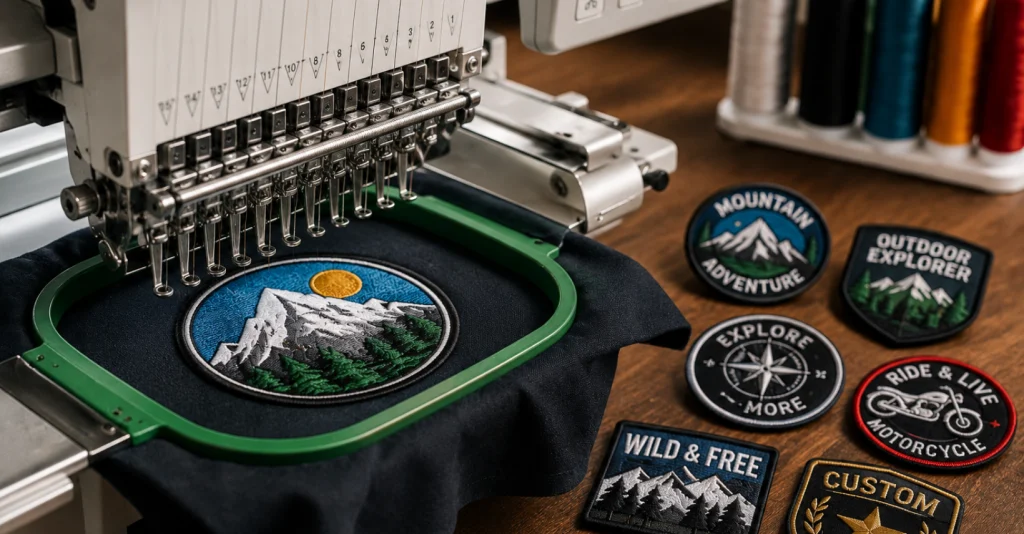
Custom patches have become one of the most popular ways to personalize clothing, uniforms, bags, hats, jackets, and accessories. Whether you’re creating branded workwear, sports team badges, military insignias, club emblems, or fashion patches, embroidery remains one of the most durable and professional decoration methods available.
With the rise of affordable embroidery machines, many beginners are eager to learn how embroidered patches are made. While the process may seem complicated at first, creating high-quality patches becomes much easier once you understand the right materials, embroidery techniques, and finishing methods.
At Custom Patch Makers UK, we’ve spent years producing premium custom embroidered patches for businesses, schools, sports clubs, charities, fashion brands, and individuals throughout the United Kingdom. In this guide, we’ll walk you through everything a beginner needs to know about making embroidered patches with an embroidery machine—from choosing the right fabric to applying the finished patch.
Whether you’re planning to start a small embroidery business or simply want to create custom patches at home, this comprehensive guide will help you build the right foundation.
What Are Embroidered Patches?
An embroidered patch is a decorative or functional badge created by stitching thread onto a fabric backing using either a manual or computerized embroidery machine. Once completed, the patch is cut into shape and finished with a border before being attached to clothing or accessories.
Unlike direct embroidery that is stitched directly onto a garment, embroidered patches are produced separately. This allows them to be sewn, ironed, or attached with hook-and-loop backing whenever needed.
Today, embroidered patches are used across countless industries, including:
- Company uniforms
- School badges
- Sports clubs
- Motorcycle clubs
- Scouts and youth organizations
- Police and security uniforms
- Military apparel
- Fashion brands
- Promotional merchandise
- Event giveaways
- Corporate branding
Their durability, professional appearance, and versatility make embroidered patches one of the most popular branding products available.
Why Choose Machine Embroidery Instead of Hand Embroidery?
Although hand embroidery is still appreciated for artistic projects, modern embroidery machines offer significant advantages, especially when producing multiple patches.
Machine embroidery provides:
Consistent Quality
Every patch maintains the same stitch density, colour placement, and finishing quality.
Faster Production
An embroidery machine can complete designs much faster than manual stitching, making it suitable for both hobbyists and commercial businesses.
Professional Finish
Modern embroidery software creates crisp lettering, smooth satin borders, and detailed fills that are difficult to achieve consistently by hand.
Greater Precision
Computer-controlled stitching follows digital artwork exactly, reducing mistakes and improving accuracy.
Scalability
Whether you’re producing one patch or one thousand, embroidery machines allow efficient production without sacrificing quality.
For beginners planning to sell patches in the future, learning machine embroidery is a worthwhile investment.
Understanding Different Types of Embroidered Patches
Before you begin making patches, it’s important to understand the different styles available. Each serves a different purpose depending on the design and intended use.
Traditional Embroidered Patches
These patches feature embroidered thread stitched onto a twill or felt fabric backing. The background remains visible between stitched areas, making them ideal for logos, uniforms, and club badges.
Traditional embroidered patches offer:
- Excellent durability
- Rich texture
- Affordable production
- Classic appearance
This is the most common type produced by professional manufacturers.
Fully Embroidered Patches
Also known as 100% embroidered patches, these designs cover nearly the entire fabric surface with embroidery thread.
Advantages include:
- Premium appearance
- Rich colours
- Luxurious texture
- Minimal visible background fabric
These patches are popular for premium branding and high-end merchandise.
Merrow Border Patches
A merrow border is the thick stitched edge commonly seen on military and scout patches.
Benefits include:
- Extra durability
- Professional appearance
- Smooth rounded edges
- Protection against fraying
However, merrow borders work best on regular shapes such as circles, rectangles, squares, and ovals.
Heat-Cut Border Patches
For complex logos with unusual outlines, manufacturers use laser or hot-cut borders instead of merrow edges.
Heat-cut borders allow:
- Custom shapes
- Fine detail
- Sharp corners
- Intricate outlines
Most modern custom logo patches use heat-cut borders.
Essential Equipment You’ll Need
One of the biggest misconceptions beginners have is believing they need expensive industrial equipment to start making patches.
In reality, you only need a few basic tools.
Embroidery Machine
The embroidery machine is the heart of the entire process.
Popular beginner-friendly machines include:
- Brother embroidery machines
- Janome embroidery machines
- Bernina embroidery machines
- Singer embroidery models
- Baby Lock embroidery machines
Commercial businesses often upgrade to multi-head embroidery machines once production increases.
Embroidery Software
Before stitching begins, artwork must be converted into embroidery files.
Digitizing software converts logos into stitch instructions for your embroidery machine.
Common embroidery file formats include:
- DST
- PES
- EXP
- JEF
- VP3
Professional digitizing significantly improves stitch quality and prevents thread breaks.
Embroidery Thread
Choosing quality thread makes a noticeable difference.
Polyester embroidery thread is often recommended because it offers:
- Bright colours
- Fade resistance
- Strong durability
- Excellent washing performance
Rayon thread is another popular choice for decorative projects because of its silky shine.
Embroidery Needles
Different fabrics require different needle sizes.
Using the wrong needle may result in:
- Broken thread
- Fabric damage
- Uneven stitching
- Needle breakage
Always replace worn needles regularly to maintain stitch quality.
Stabilizer
Stabilizer supports the fabric during embroidery and prevents distortion.
Common types include:
Cut-Away Stabilizer
Ideal for soft fabrics requiring permanent support.
Tear-Away Stabilizer
Suitable for woven fabrics and patches.
Water-Soluble Stabilizer
Used when embroidery needs temporary support.
Most embroidered patches use tear-away stabilizer because it removes cleanly after stitching.
Choosing the Right Fabric for Embroidered Patches
Fabric selection plays a major role in the appearance and durability of your patches.
Different fabrics produce different textures and finishes.
Twill Fabric
Twill is the industry standard for embroidered patches.
Advantages include:
- Durable weave
- Smooth embroidery surface
- Professional appearance
- Affordable price
- Wide colour selection
Most company logo patches use twill backing.
Felt Fabric
Felt is soft, inexpensive, and beginner-friendly.
Benefits include:
- Easy to embroider
- Doesn’t fray easily
- Thick appearance
- Ideal for craft projects
Many schools and hobbyists prefer felt when learning embroidery.
Denim
Denim creates stylish embroidered patches perfect for fashion applications.
Popular uses include:
- Denim jackets
- Jeans
- Streetwear brands
- Vintage-inspired collections
Its thick texture gives patches a rugged appearance.
Canvas
Canvas is another durable material suitable for outdoor gear and workwear patches.
It resists wear while providing excellent stitch definition.
Leather
Leather patches create a premium luxury appearance.
Although embroidery on leather requires specialized needles and slower machine speeds, the final result is distinctive and highly durable.
Many premium fashion brands use embroidered leather patches for hats, bags, and jackets.
Fabric-Free Embroidery
Some advanced embroidery techniques allow patches to be made almost entirely from thread using water-soluble stabilizers.
After the stabilizer dissolves, only the stitched design remains.
These are commonly known as freestanding lace or thread-only patches.
Choosing the Right Patch Size
Patch size affects stitch count, production time, and overall appearance.
As a beginner, avoid creating extremely small designs filled with tiny lettering.
Common patch sizes include:
| Purpose | Recommended Size |
|---|---|
| Hat Logo | 2–3 inches |
| Sleeve Badge | 3 inches |
| Chest Patch | 3–4 inches |
| Jacket Back | 8–12 inches |
| Club Emblem | 4–5 inches |
Larger patches require more stitches but allow greater design detail.
Preparing Your Artwork
Before turning on your embroidery machine, your artwork should be clean and easy to read.
Good embroidery designs feature:
- Bold outlines
- Thick lettering
- Simple shapes
- Balanced colours
- Clear spacing
Avoid extremely fine details, tiny text, and excessive gradients, as embroidery machines cannot reproduce them effectively.
Professional digitizing ensures your design stitches beautifully while minimizing production issues.
Step-by-Step Guide to Making Embroidered Patches with an Embroidery Machine
Now that you understand the materials, equipment, and different types of embroidered patches, it’s time to start making one. While every embroidery machine has slightly different controls, the overall process is very similar. Following these steps will help you create clean, durable, and professional-looking patches.
At Custom Patch Makers UK, every patch goes through a carefully managed production process to ensure precision, consistency, and long-lasting quality. Beginners can follow the same principles on a smaller scale to achieve excellent results.
Step 1: Create or Prepare Your Design
Every embroidered patch begins with a design. Whether you’re creating a company logo, sports emblem, club badge, or personal artwork, the quality of your design will determine the final appearance of your patch.
Before digitizing your artwork, make sure it has:
- Clean outlines
- Bold text
- Minimal tiny details
- Balanced spacing
- High-resolution artwork
- Limited colour palette
Simple designs are much easier for beginners to embroider and often produce cleaner results.
If you’re designing a patch for a business, consider using vector artwork. Vector files such as AI, EPS, or SVG maintain quality regardless of size and are ideal for embroidery digitizing.
Step 2: Digitize the Artwork
Unlike a standard printer, an embroidery machine cannot interpret images directly. Your artwork must first be converted into embroidery data through a process called digitizing.
Digitizing software transforms your design into thousands of individual stitches while specifying:
- Stitch direction
- Stitch type
- Stitch density
- Thread colour changes
- Underlay stitches
- Border stitching
- Trim commands
Proper digitizing is one of the most important aspects of embroidery. Even the best embroidery machine cannot compensate for a poorly digitized design.
If you’re new to embroidery, consider having your artwork digitized professionally until you become comfortable using embroidery software yourself.
Step 3: Select the Right Fabric
The fabric you choose will directly affect the appearance and durability of your patch.
For beginners, twill fabric is highly recommended because it offers:
- Excellent stitch stability
- Minimal stretching
- Smooth embroidery surface
- Professional finish
- Easy handling
Before hooping the fabric, inspect it carefully to ensure there are no wrinkles or imperfections that could affect stitching quality.
Step 4: Apply Stabilizer
Stabilizer keeps the fabric firm during embroidery and prevents shifting while the machine is stitching.
Without stabilizer, you may experience:
- Distorted designs
- Wrinkled patches
- Uneven lettering
- Loose stitches
- Misaligned embroidery
Place the stabilizer beneath the fabric and secure both materials together inside the embroidery hoop.
Make sure everything is stretched evenly but not overly tight, as excessive tension may distort the fabric.
Step 5: Hoop the Fabric Correctly
Proper hooping is one of the most overlooked steps among beginners.
Your fabric should be:
- Flat
- Smooth
- Secure
- Free from wrinkles
- Evenly tensioned
A poorly hooped fabric can move during embroidery, causing outlines and fills to become misaligned.
Before tightening the hoop, gently pull the fabric from each side to remove any slack.
Step 6: Install the Correct Needle
Different fabrics require different embroidery needles.
For most patch materials, a size 75/11 or 80/12 embroidery needle works well.
Replace needles regularly because dull needles may cause:
- Thread breaks
- Fabric snags
- Skipped stitches
- Uneven embroidery
Professional embroidery shops frequently change needles to maintain consistent quality.
Step 7: Thread Your Machine
Choose high-quality embroidery thread for both the top thread and bobbin.
Popular thread materials include:
Polyester Thread
Polyester is the industry standard because it is:
- Fade resistant
- Strong
- Colourfast
- Machine washable
- Durable
Rayon Thread
Rayon provides:
- Silky appearance
- Bright colours
- Elegant finish
However, rayon is slightly less durable than polyester, making polyester a better choice for uniforms and workwear.
Step 8: Load the Design into Your Embroidery Machine
Transfer the digitized embroidery file to your machine using:
- USB drive
- Memory card
- Wireless transfer (depending on the machine)
Before pressing start, double-check:
- Design size
- Orientation
- Thread colours
- Hoop size
- Stitch count
Most embroidery machines display a preview of the finished design before stitching begins.
Step 9: Test Stitch the Design
Never begin production without testing your design first.
A test stitch allows you to identify problems such as:
- Incorrect stitch density
- Thread tension issues
- Lettering problems
- Colour sequence mistakes
- Misaligned outlines
Testing saves both time and materials, especially when producing multiple patches.
Professional manufacturers always perform sample runs before starting bulk production.
Step 10: Begin Embroidering the Patch
Once everything has been checked, start the embroidery process.
Stay nearby while the machine is running so you can quickly address issues like:
- Broken thread
- Empty bobbin
- Needle breakage
- Fabric movement
- Thread tangles
Even advanced embroidery machines occasionally require operator attention.
Avoid pulling or touching the fabric while the machine is stitching.
Understanding Stitch Types
Embroidery machines use different stitch styles depending on the design.
Running Stitch
Running stitches create thin outlines and fine details.
They are commonly used for:
- Small text
- Decorative accents
- Internal detailing
Satin Stitch
Satin stitches produce smooth, raised lines.
They’re ideal for:
- Borders
- Lettering
- Outlines
- Small shapes
Most embroidered patch borders are made using satin stitches.
Fill Stitch
Fill stitches cover large background areas with dense embroidery.
Different fill patterns create unique textures while maintaining durability.
Creating a Professional Patch Border
A clean border transforms an ordinary embroidered design into a professional patch.
There are several border styles to choose from.
Merrow Border
A merrow border wraps thick thread around the edge of the patch.
Benefits include:
- Prevents fraying
- Creates a traditional appearance
- Adds durability
- Smooth rounded finish
Merrow borders work best on:
- Circles
- Ovals
- Squares
- Rectangles
Satin Border
For custom-shaped patches, satin borders are often preferred.
Advantages include:
- Sharp corners
- Intricate shapes
- Modern appearance
- Excellent detail
Many logo patches today use satin borders instead of merrow edges.
Laser-Cut Edge
Some professional manufacturers laser-cut patches after embroidery.
Laser cutting offers:
- Precision
- Clean edges
- Complex outlines
- Minimal fabric fraying
This technique is widely used for custom logo patches and promotional merchandise.
Cutting Out the Patch
Once embroidery is complete, the patch must be removed from the backing fabric.
Several methods can be used depending on your equipment.
Scissors
Beginners often use embroidery scissors.
Curved embroidery scissors or duckbill scissors provide better visibility while trimming close to the border.
Work slowly around the edge to avoid cutting the embroidery thread.
Rotary Cutter
A rotary cutter works well for:
- Straight edges
- Square patches
- Rectangular designs
It produces cleaner cuts than ordinary scissors.
Hot Knife
A hot knife melts synthetic fabric as it cuts.
Benefits include:
- Prevents fraying
- Seals edges
- Produces cleaner borders
This method works particularly well with polyester twill.
Digital Cutting Machines
Machines such as Cricut or Brother ScanNCut can cut embroidered patches with remarkable precision.
They are ideal for:
- Consistent production
- Intricate outlines
- Multiple identical patches
Laser Cutting
Commercial patch manufacturers frequently use laser cutting systems.
Laser cutting provides:
- Exceptional precision
- Smooth edges
- Fast production
- Accurate repeatability
Although expensive, laser cutters dramatically improve efficiency in high-volume manufacturing.
Cleaning the Finished Patch
After trimming, inspect the patch carefully.
Remove:
- Loose threads
- Jump stitches
- Stabilizer residue
- Fabric fibres
Small embroidery scissors and tweezers are excellent tools for final cleanup.
A clean finish greatly improves the professional appearance of the patch.
Quality Inspection
Before attaching the patch, inspect every detail.
Check:
- Stitch consistency
- Colour accuracy
- Border quality
- Fabric cleanliness
- Overall symmetry
Professional patch manufacturers inspect every order before shipping to ensure customers receive premium-quality products.
Tips for Beginners
If you’re just starting, keep these practical tips in mind:
- Start with simple shapes like circles or rectangles.
- Use quality embroidery thread to reduce breakage.
- Always perform a test stitch before production.
- Keep your embroidery machine clean and well-maintained.
- Replace needles regularly for consistent results.
- Avoid overcrowding designs with tiny text or excessive detail.
- Practice on inexpensive fabric before working on premium materials.
- Take your time when trimming the finished patch.
Building confidence through practice will help you produce cleaner, more professional patches with every project.
Finishing Embroidered Patches
After completing the embroidery and cutting process, your custom patch is almost ready. However, the finishing stage is equally important because it determines how the patch will be attached, how long it will last, and how professional the final product looks.
A beautifully embroidered patch can lose its value if the backing is poor or if it is attached incorrectly. Professional patch makers focus not only on embroidery quality but also on durability, usability, and customer requirements.
At Custom Patch Makers UK, we create custom embroidered patches with different backing options to suit various applications, including uniforms, hats, jackets, bags, workwear, and promotional clothing. Understanding these finishing options will help beginners choose the best method for their own projects.
Different Types of Embroidered Patch Backings
The backing applied to an embroidered patch determines how it will be attached to a garment or accessory. Different industries prefer different attachment methods based on their needs.
Let’s explore the most common options.
Sew-On Patches
Sew-on patches are the traditional and most durable patch attachment method.
As the name suggests, the patch is stitched directly onto the fabric using a needle and thread or a sewing machine.
Advantages of Sew-On Patches:
- Extremely secure attachment
- Long-lasting durability
- Suitable for frequent washing
- Works on almost all fabrics
- Ideal for uniforms and workwear
Sew-on patches are commonly used by:
- Military organizations
- Police departments
- Sports clubs
- Motorcycle groups
- Outdoor clothing brands
For garments that experience heavy use, sew-on patches are often the best choice.
Iron-On Patches
Iron-on patches are one of the most popular choices because they are easy to apply without sewing equipment.
These patches have a heat-activated adhesive backing that bonds with fabric when pressure and heat are applied.
Benefits of Iron-On Patches:
- Quick application
- No sewing required
- Beginner-friendly
- Affordable option
- Great for fashion clothing
Iron-on patches work best on materials such as:
- Cotton
- Denim
- Polyester blends
However, extremely stretchy or heat-sensitive fabrics may not be suitable for iron-on application.
For better durability, many users combine iron-on backing with additional stitching around the edges.
Hook and Loop Backing (Velcro Style)
Hook and loop backing is a popular choice for patches that need to be removed and replaced frequently.
One side attaches to the patch, while the other side is attached to the garment.
Common Uses Include:
- Tactical uniforms
- Security clothing
- Outdoor equipment
- Work uniforms
- Emergency services apparel
The biggest advantage is flexibility. Users can swap patches whenever needed without damaging the garment.
Adhesive Backing
Adhesive-backed patches use a strong peel-and-stick layer.
They are suitable for temporary applications such as:
- Events
- Promotional campaigns
- Trade shows
- Marketing giveaways
While convenient, adhesive patches usually do not offer the same durability as sew-on or iron-on options.
Magnetic Patch Backing
Magnetic patches are a modern option that allows users to attach and remove patches easily.
They are often used for:
- Accessories
- Bags
- Hats
- Promotional items
Because no adhesive or stitching is required, magnetic patches protect the original material from damage.
How to Attach an Embroidered Patch Correctly
The attachment method depends on the type of backing selected.
Here are some basic instructions.
Applying an Iron-On Patch
Follow these steps:
- Place the patch on the desired location.
- Cover it with a thin cloth or pressing sheet.
- Heat an iron to the recommended temperature.
- Press firmly for around 15–30 seconds.
- Allow the patch to cool completely.
- Check that all edges are securely attached.
For maximum strength, sew around the border after ironing.
Sewing a Patch by Hand
To sew a patch manually:
- Position the patch correctly.
- Secure it temporarily with pins.
- Choose a matching thread colour.
- Stitch around the border.
- Tie secure knots at the back.
A blanket stitch or whip stitch provides a clean professional finish.
Using a Sewing Machine
A sewing machine provides stronger and faster results.
It is ideal for:
- Large patches
- Multiple garments
- Business uniforms
- Bulk projects
Use a strong polyester thread for maximum durability.
Common Mistakes Beginners Make When Creating Embroidered Patches
Learning embroidery takes practice. Beginners often make mistakes that affect the quality of their patches.
Here are some common problems and how to avoid them.
Mistake 1: Using Low-Quality Materials
Cheap fabric and poor-quality thread can result in:
- Weak stitches
- Colour fading
- Thread breaks
- Poor appearance
Always invest in reliable materials, especially if you plan to sell patches professionally.
Mistake 2: Choosing an Overly Complicated Design
Not every logo translates well into embroidery.
Tiny details, thin lines, and small text can become unclear after stitching.
A good embroidered design should focus on:
- Strong shapes
- Clear outlines
- Readable lettering
- Balanced colours
Sometimes simplifying a design creates a much better embroidered result.
Mistake 3: Incorrect Thread Tension
Thread tension problems can create:
- Loose stitches
- Visible bobbin thread
- Uneven embroidery
- Fabric puckering
Always test your machine settings before beginning a final patch.
Mistake 4: Skipping Stabilizer
Many beginners underestimate the importance of stabilizer.
Without proper support, embroidery may:
- Shift during stitching
- Lose shape
- Become uneven
Stabilizer is essential for professional-looking patches.
Mistake 5: Incorrect Cutting Technique
Rushing the cutting process can damage your patch.
Avoid cutting too close to embroidery stitches because this can cause unraveling.
Take your time and leave a clean edge around the design.
Mistake 6: Poor Machine Maintenance
Embroidery machines require regular care.
Maintenance tasks include:
- Cleaning lint buildup
- Changing needles
- Checking thread paths
- Oiling parts when required
- Updating software
A well-maintained machine produces better embroidery quality.
How to Care for Embroidered Patches
Proper care helps embroidered patches maintain their appearance for years.
Follow these tips:
Wash Carefully
Use gentle washing settings whenever possible.
Avoid harsh chemicals that may damage embroidery threads.
Avoid Excessive Heat
High temperatures can weaken adhesive backings and affect thread colours.
Always follow fabric care instructions.
Store Properly
If you create unused patches, store them in a dry location away from direct sunlight.
This prevents fading and material damage.
Starting a Small Embroidery Patch Business
Many beginners start making patches as a hobby and later turn it into a profitable business.
The demand for custom patches continues to grow because businesses, organizations, and individuals want unique branding solutions.
Potential customers include:
- Clothing brands
- Sports teams
- Schools
- Restaurants
- Security companies
- Event organizers
- Motorcycle communities
- Fashion designers
Before launching a patch business, focus on:
- Learning embroidery techniques
- Understanding customer requirements
- Creating sample designs
- Building a portfolio
- Maintaining consistent quality
Professional-quality patches help businesses create stronger brand identities.
Frequently Asked Questions About Making Embroidered Patches
Can beginners make embroidered patches at home?
Yes, beginners can create embroidered patches at home using a suitable embroidery machine, quality materials, and proper practice. Starting with simple designs is recommended.
What embroidery machine is best for making patches?
Beginner-friendly embroidery machines from brands like Brother, Janome, and Singer are suitable for learning. Commercial businesses often upgrade to multi-needle machines for faster production.
How long does it take to make an embroidered patch?
The production time depends on the design size, stitch count, and machine speed. Simple patches may take a few minutes, while detailed designs can require much longer.
What fabric is best for embroidered patches?
Twill fabric is considered one of the best choices because it provides durability, stability, and a smooth embroidery surface.
Can embroidered patches be washed?
Yes, high-quality embroidered patches can be washed. Sew-on and properly applied iron-on patches can last through many washing cycles when cared for correctly.
Are custom embroidered patches expensive?
The price depends on factors such as:
- Patch size
- Number of colours
- Stitch count
- Quantity
- Backing option
- Design complexity
Ordering larger quantities usually reduces the cost per patch.
Can I create custom-shaped patches?
Yes. Modern embroidery and cutting technology allows manufacturers to produce patches in almost any shape, including logos, mascots, symbols, and unique artwork.
Why Choose Custom Patch Makers UK for Your Embroidered Patches?
Creating professional embroidered patches requires experience, precision, and attention to detail. While beginners can enjoy making patches at home, businesses and organizations often need reliable quality and consistent production.
At Custom Patch Makers UK, we specialize in creating premium-quality custom embroidered patches designed for different industries and applications.
Our services include:
- Custom embroidered patches
- Iron-on patches
- Sew-on patches
- Velcro patches
- Logo patches
- Uniform badges
- Custom clothing patches
- Personalized patch designs
We combine modern embroidery technology with skilled craftsmanship to deliver patches that look professional and last for years.
Whether you need a single custom patch or a bulk order for your organization, our team can help transform your ideas into high-quality embroidered products.
Final Thoughts
Learning how to make patches with an embroidery machine is an exciting skill that combines creativity, technology, and craftsmanship. From selecting the right fabric and designing artwork to embroidery, cutting, and finishing, every step plays an important role in creating a professional result.
Beginners should focus on practicing basic designs, understanding machine settings, and using quality materials. With time and experience, you can create impressive embroidered patches for personal projects or even build a successful patch-making business.
If you want professionally produced embroidered patches without the complexity of doing everything yourself, Custom Patch Makers UK is ready to bring your designs to life with high-quality craftsmanship and reliable service.