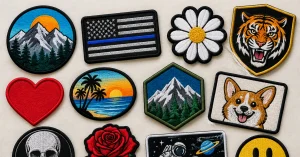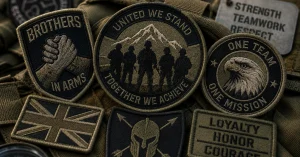
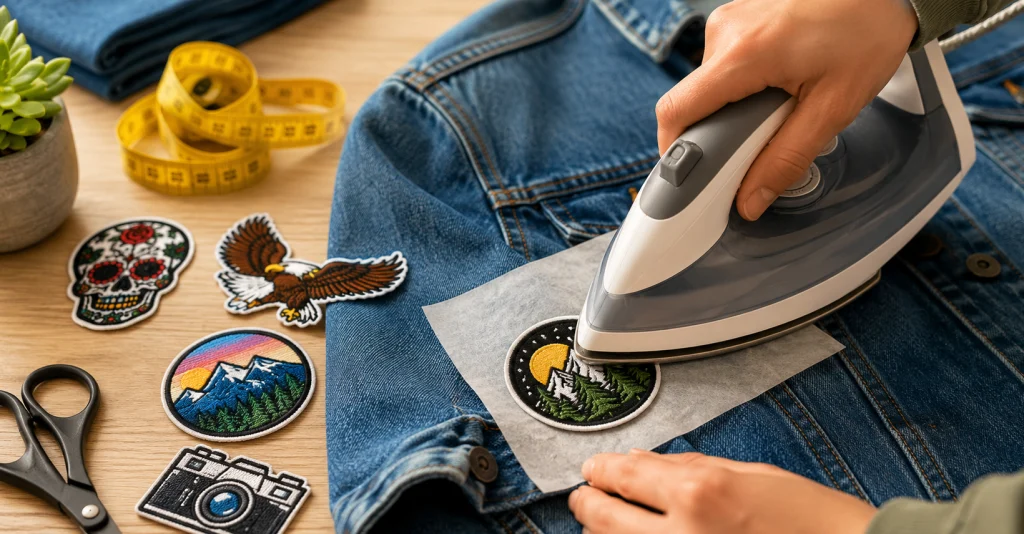
Iron-on patches have become one of the easiest and most stylish ways to personalize clothing, repair damaged garments, and give old apparel a completely new look. Whether you want to cover a tear in your favourite denim jacket, add personality to a backpack, or customize uniforms with professional-looking emblems, iron-on patches offer a quick and affordable solution.
At Custom Patch Makers UK, we manufacture premium-quality custom iron-on patches designed with durable embroidery, strong heat-activated adhesive, and long-lasting colours. Our patches are created to withstand everyday use while giving your clothing a clean and professional finish.
Although iron-on patches are incredibly easy to use, many people make simple mistakes during application. Using the wrong fabric, incorrect temperature, or uneven pressure can prevent the adhesive from bonding properly, causing patches to peel away after only a few washes.
Fortunately, applying iron-on patches isn’t difficult when you know the correct process.
In this comprehensive guide, you’ll learn everything you need to know from choosing the right fabric and preparing your garment to ironing techniques, temperature recommendations, maintenance tips, and expert advice for making your patches last for years.
Why Iron-On Patches Are So Popular
Iron-on patches have evolved from simple repair tools into fashionable accessories used by clothing brands, sports teams, schools, military units, bikers, businesses, artists, and fashion enthusiasts.
Instead of purchasing new clothing every time an item becomes damaged or outdated, you can transform it with a professionally designed patch.
Some popular reasons people choose iron-on patches include:
- Repair holes, tears, and worn-out fabric
- Personalize jackets, hoodies, jeans, hats, and bags
- Promote businesses with branded logos
- Display club memberships or achievements
- Create matching uniforms
- Add vintage or streetwear aesthetics
- Make DIY fashion projects
- Customize gifts
Because they require no sewing experience, iron-on patches are ideal for beginners and professionals alike.
Understanding How Iron-On Patches Work
Unlike sew-on patches, iron-on patches include a layer of heat-activated adhesive on the back.
When sufficient heat and pressure are applied, this adhesive melts and bonds directly with the fibres of the fabric.
Once cooled, the glue hardens, creating a strong attachment between the garment and the patch.
The effectiveness of this bond depends on several factors:
- Fabric compatibility
- Correct temperature
- Even pressure
- Heating duration
- Cooling time
If any of these steps are skipped, the patch may begin lifting around the edges or peel off completely.
What Makes a High-Quality Iron-On Patch?
Not every iron-on patch is manufactured to the same standard.
Premium patches use stronger adhesive, tighter embroidery, better backing material, and colourfast threads that maintain their appearance over time.
At Custom Patch Makers UK, our custom iron-on patches are produced using premium embroidery threads and industrial-grade adhesive that provides excellent bonding when applied correctly.
A quality patch should include:
- Thick embroidery
- Sharp design details
- Durable heat-activated backing
- Strong edge stitching
- Fade-resistant colours
- Flexible fabric base
- Clean finish
Investing in high-quality patches ensures they remain securely attached while maintaining their appearance after repeated wear.
Which Fabrics Are Best for Iron-On Patches?
Choosing the correct fabric is the first step toward successful application.
Certain materials absorb heat well and allow the adhesive to penetrate the fibres effectively.
Others are too delicate or heat-sensitive, making ironing risky.
Best Fabrics
Cotton
Cotton is one of the easiest materials for applying iron-on patches.
Its natural fibres tolerate heat well, allowing the adhesive to melt evenly and create a secure bond.
Ideal for:
- T-shirts
- Hoodies
- Sweatshirts
- Work shirts
- Tote bags
Denim
Denim is perhaps the most popular fabric for decorative patches.
Its thick weave provides an excellent surface for long-lasting adhesion.
Perfect for:
- Denim jackets
- Jeans
- Vests
- Backpacks
Canvas
Canvas is another excellent material because of its sturdy texture.
It works particularly well for:
- Tool bags
- Travel bags
- Shoes
- Aprons
- Laptop sleeves
Cotton Blends
Most cotton blends perform well as long as they contain a high percentage of cotton.
Always test lower temperatures first before increasing heat.
Twill
Many school uniforms and work uniforms are made from twill fabric, which accepts iron-on patches very well.
Fabrics That Require Extra Care
Some fabrics can still work with iron-on patches but require lower temperatures.
These include:
- Polyester
- Rayon
- Nylon blends
- Performance fabrics
Too much heat can permanently damage these materials.
Always consult the garment care label before beginning.
Fabrics You Should Never Iron
Some materials simply aren’t compatible with iron-on adhesives.
Avoid ironing patches directly onto:
Leather
Leather can dry out, shrink, crack, or burn when exposed to excessive heat.
Instead, use sew-on patches or leather-safe adhesive.
Silk
Silk is extremely delicate.
High temperatures can scorch the fabric within seconds.
Velvet
The texture of velvet becomes flattened permanently under heat.
Cashmere
Cashmere fibres are too delicate for direct ironing.
Faux Leather
Artificial leather coatings often melt under ironing temperatures.
Waterproof Fabrics
Outdoor jackets frequently contain waterproof coatings that can become damaged by heat.
Tools You’ll Need Before Starting
The good news is that applying an iron-on patch doesn’t require expensive equipment.
Gather these items beforehand:
- Iron
- Ironing board
- Clean cotton cloth
- Parchment paper or baking paper
- Iron-on patch
- Heat-resistant garment
- Tweezers (optional)
- Measuring tape (optional)
Preparing everything before starting makes the process much smoother.
Preparing Your Garment
Preparation is one of the most overlooked steps.
Skipping it often results in weak adhesion.
Before applying your patch:
Wash the Garment
Freshly washed clothing removes:
- Dust
- Fabric softener residue
- Dirt
- Oils
These substances can interfere with the adhesive.
Avoid using fabric conditioner immediately before application.
Dry Completely
Never apply patches to damp clothing.
Moisture prevents the glue from reaching the proper temperature.
Iron the Surface
Wrinkles create uneven contact.
Iron the garment first so the patch sits perfectly flat.
Plan the Placement
Before turning on the iron:
Place the patch exactly where you want it.
Take a step back.
View it from different angles.
Once attached, repositioning becomes difficult.
Some common placement ideas include:
- Left chest
- Jacket sleeves
- Upper back
- Hat fronts
- Jean pockets
- Backpack fronts
- Hoodie sleeves
Should You Preheat the Fabric?
Yes.
Many professionals recommend preheating the garment for around 10–15 seconds.
This removes any remaining moisture while warming the fibres, allowing the adhesive to bond more effectively.
It’s a small step that makes a noticeable difference in durability.
Understanding Iron Settings
Not every garment requires the same amount of heat.
Your iron should always be set according to the garment rather than the patch.
General guidelines include:
| Fabric | Temperature |
|---|---|
| Cotton | High |
| Denim | High |
| Canvas | High |
| Polyester | Medium |
| Cotton Blend | Medium-High |
| Rayon | Low-Medium |
Always switch off the steam function before applying your patch.
Steam introduces moisture that weakens the adhesive bond and can prevent the glue from melting evenly.
Why Pressure Matters More Than People Think
Many beginners simply place the iron on top of the patch and wait.
That’s not enough.
Proper pressure helps push the melted adhesive deep into the fabric fibres.
Instead of moving the iron back and forth like regular ironing, press firmly in one position before lifting and repeating if necessary.
Maintaining consistent pressure is often the difference between a patch that lasts years and one that peels after the first wash.
Now that you’ve prepared your garment, selected the right fabric, and gathered your tools, it’s time for the most important stage the actual application process.
Although ironing on a patch only takes a few minutes, doing it correctly makes all the difference. Rushing the process or skipping small details can result in patches that lift around the edges or fall off after just a few washes.
At Custom Patch Makers UK, we recommend following these professional techniques to achieve a secure, long-lasting bond that looks as good as factory-applied patches.
Step 1: Position the Patch Carefully
Before turning on the iron, place the patch exactly where you want it.
Unlike stickers, iron-on patches cannot be easily repositioned after the adhesive has melted, so take your time.
Here are a few tips for accurate placement:
- Fold jackets or shirts in half to find the centre.
- Use a ruler or measuring tape for symmetrical placement.
- Stand back and check the design from different angles.
- For multiple patches, arrange them first before ironing.
If you’re decorating a jacket or backpack with several patches, consider taking a quick photo before applying them. This helps you visualize the final layout and make adjustments if needed.
Step 2: Cover the Patch
Never place the hot iron directly onto an embroidered patch.
Instead, cover it with one of the following:
- A clean cotton cloth
- Parchment paper
- Baking paper
- A thin pressing cloth
This protective layer prevents:
- Burn marks
- Scorched embroidery
- Melted thread
- Adhesive sticking to the iron
- Damage to delicate fabrics
A pressing cloth also distributes heat more evenly, helping the adhesive activate consistently across the entire patch.
Step 3: Set the Correct Temperature
One of the biggest mistakes people make is using either too much or too little heat.
Too little heat means the adhesive won’t melt properly.
Too much heat can damage both the patch and the garment.
Here are general guidelines:
Cotton
- 150–200°C (300–390°F)
Denim
- 180–200°C (355–390°F)
Canvas
- 180–200°C
Polyester
- 135–150°C (275–300°F)
Cotton Blend
- Around 160°C
Always check the garment’s care label before ironing.
When in doubt, start with a lower temperature and gradually increase it if needed.
Step 4: Turn Off the Steam
This step is surprisingly important.
Steam creates moisture between the adhesive and the fabric, making it harder for the glue to bond properly.
Always use a completely dry iron when applying iron-on patches.
If your iron has an automatic steam function, empty the water reservoir before beginning.
Step 5: Apply Firm Pressure
Place the iron over the covered patch.
Instead of sliding the iron back and forth like normal ironing, press firmly in one position.
Maintain steady pressure for approximately:
- Small patches: 15–20 seconds
- Medium patches: 25–30 seconds
- Large patches: 35–45 seconds
If your patch is larger than the base of your iron, move slowly to different sections while slightly overlapping each area.
Every section should receive equal pressure.
Step 6: Iron the Back of the Garment
Many professionals skip this step, but it’s one of the easiest ways to strengthen adhesion.
Turn the garment inside out.
Apply heat to the back of the patch for another 15–20 seconds.
This allows the adhesive to penetrate deeper into the fabric fibres, creating a stronger bond.
Step 7: Allow It to Cool Naturally
Patience is essential.
Don’t peel, stretch, or test the patch immediately.
Leave the garment on a flat surface for at least 10–15 minutes.
As the adhesive cools, it hardens and locks the patch securely into place.
Touching it too soon may weaken the bond.
Step 8: Inspect Every Edge
Once cooled, gently run your finger around the border.
Look for:
- Lifted corners
- Loose edges
- Air bubbles
- Uneven attachment
If any area isn’t fully attached:
- Cover it again.
- Apply heat for another 10–15 seconds.
- Allow it to cool completely before checking again.
Avoid repeatedly reheating the patch, as excessive heat may damage the adhesive over time.
Professional Tips for Better Results
Small details can make a significant difference in how well your patch stays attached.
Here are some expert recommendations:
Use a Hard Surface
A sturdy ironing board or wooden table covered with a towel provides better pressure than a soft bed or couch.
Clean Your Iron
Old residue on the iron’s soleplate can transfer onto your garment.
Wipe the iron clean before use.
Avoid Moving the Iron
Sliding the iron can shift the patch out of position.
Press straight down instead.
Let Gravity Help
Keep the garment flat during cooling.
Hanging it immediately can stress the adhesive before it hardens.
Common Mistakes to Avoid
Even high-quality patches can fail if they’re applied incorrectly.
Here are the most common mistakes and how to avoid them.
Using Steam
Steam introduces moisture and weakens the adhesive bond.
Always use dry heat.
Skipping the Protective Cloth
Direct heat can scorch embroidery and leave shiny marks on fabric.
Ironing Over Zippers or Buttons
Uneven surfaces reduce pressure.
Move these obstacles out of the way whenever possible.
Applying to Dirty Clothing
Dust, lint, oils, or fabric softener residue prevent proper adhesion.
Always start with clean garments.
Ignoring Fabric Labels
Some synthetic materials can melt under high temperatures.
Read the care instructions first.
Wearing the Garment Immediately
Allow enough cooling time before using the item.
How Long Should You Press?
Different patch sizes require different heating times.
| Patch Size | Recommended Time |
|---|---|
| Small (up to 2 inches) | 15–20 seconds |
| Medium (2–4 inches) | 20–30 seconds |
| Large (4–6 inches) | 30–40 seconds |
| Oversized patches | 40–60 seconds (in sections) |
Remember, it’s better to apply heat in short intervals and check the bond rather than overheating the patch.
Why Some Patches Don’t Stick
If your patch refuses to stay attached, there are usually a few common reasons:
Insufficient Heat
The adhesive hasn’t fully melted.
Increase the temperature slightly (if the fabric allows) and try again.
Not Enough Pressure
Simply resting the iron on the patch isn’t enough.
Press down firmly.
Uneven Heating
Large patches require attention across the entire surface.
Don’t focus only on the centre.
Unsuitable Fabric
Materials like leather, nylon, or waterproof fabrics don’t bond well with heat-activated adhesives.
Low-Quality Adhesive
Cheap patches often use weak glue that fails after a few wears.
Premium patches from Custom Patch Makers UK are manufactured with industrial-grade heat-activated backing to provide a stronger, more reliable bond when applied correctly.
Can You Iron On Patches More Than Once?
Yes but only to a point.
If a corner starts lifting, you can usually reactivate the adhesive by applying heat again.
However, repeated reheating reduces the effectiveness of the glue over time.
If the patch continues to peel after several attempts, sewing around the border is the best long-term solution.
Should You Sew Around an Iron-On Patch?
Many professionals do.
Although premium iron-on patches are designed to stay firmly attached, stitching around the edges provides extra security for items exposed to frequent movement or washing.
Consider sewing patches on:
- Work uniforms
- Motorcycle jackets
- Sports bags
- School backpacks
- Children’s clothing
- Outdoor gear
This combination of heat and stitching offers the greatest durability.
Best Clothing Items for Iron-On Patches
Iron-on patches work well on a variety of garments and accessories, including:
- Denim jackets
- Jeans
- Hoodies
- Sweatshirts
- T-shirts
- Cotton shirts
- Canvas tote bags
- Backpacks
- Aprons
- Baseball caps (with care)
- Uniforms
- Workwear
These items provide stable surfaces that help the adhesive form a strong, lasting bond.
Now that you’ve learned the proper way to apply an iron-on patch, the next step is ensuring it stays securely attached for years. Even the highest-quality patch needs proper care after application. Washing, drying, storage, and everyday wear all affect how long the adhesive lasts.
At Custom Patch Makers UK, we create premium iron-on patches with strong heat-activated backing designed for durability. However, following a few simple care tips will help you get the maximum lifespan from every patch.
Let’s explore everything you need to know after the application process.
Can You Apply Iron-On Patches Without an Iron?
Absolutely.
Although a household iron is the most common tool, it’s not the only option. Depending on what you have available, several alternatives can produce excellent results.
Option 1: Use a Heat Press
A heat press is the preferred method for businesses, clothing brands, and professional decorators because it applies consistent heat and pressure across the entire patch.
Benefits of a Heat Press
- Even temperature distribution
- Uniform pressure
- Faster application
- Stronger adhesive bond
- Ideal for bulk orders
For embroidered logo patches, school badges, or branded workwear, a heat press delivers a professional finish every time.
Option 2: Use a Hair Straightener
If you’re travelling or don’t have access to an iron, a clean hair straightener can be a practical alternative for small patches.
How to Apply a Patch with a Hair Straightener
- Clean the straightener to remove any product residue.
- Heat it to a medium or high setting (depending on the fabric).
- Position the patch where you want it.
- Place parchment paper over the patch.
- Clamp the straightener over one section for 15–20 seconds.
- Move to the next section if the patch is larger than the plates.
- Let the garment cool before checking the bond.
This method works best for smaller patches on flat surfaces, such as sleeves, pockets, or bags.
Option 3: Use a Mini Craft Iron
Mini craft irons are excellent for detailed work, especially when applying patches to:
- Caps
- Shoes
- Small bags
- Sleeves
- Children’s clothing
Their compact size allows you to reach areas that a standard iron may struggle with.
Can You Iron Patches onto Hats?
Yes, but it depends on the style of the hat.
Flat-front caps and bucket hats are generally easier to customise because they provide a smoother surface. Structured caps with curved fronts can be more challenging and may require a mini iron or heat press designed for hats.
For premium custom caps, many professionals choose to stitch the patch after ironing for added durability.
Can You Apply Iron-On Patches to Backpacks?
Backpacks are one of the most popular items for customisation.
Canvas and cotton backpacks are excellent choices because they can tolerate the heat required for activation.
Before applying a patch:
- Empty the backpack completely.
- Place a firm surface or folded towel inside to create a flat working area.
- Avoid ironing over zips, buckles, or plastic trims.
If the backpack is made from nylon or another heat-sensitive material, sewing the patch is a safer option.
What About Jackets?
Iron-on patches look fantastic on jackets, especially:
- Denim jackets
- Cotton jackets
- Canvas jackets
- Utility jackets
- Work jackets
Leather jackets, however, should not be ironed. Heat can damage the leather, so sew-on patches are the recommended choice.
Caring for Your Iron-On Patches
Applying the patch correctly is only half the job. Proper maintenance ensures it continues to look great and stay securely attached.
Wait Before Washing
After application, avoid washing the garment for at least 24–48 hours. This gives the adhesive enough time to fully cure and strengthen.
Wash Inside Out
Turning your garment inside out reduces friction between the patch and other clothing during washing.
This simple habit helps preserve both the embroidery and the adhesive.
Use Cold or Lukewarm Water
High water temperatures can soften the adhesive over time.
Cold or lukewarm water is ideal for maintaining a secure bond.
Choose a Gentle Wash Cycle
If using a washing machine, select a gentle or delicate cycle to minimise stress on the patch.
For valuable or heavily customised garments, hand washing is the safest option.
Avoid Harsh Detergents
Strong bleach and aggressive stain removers can weaken the adhesive and fade embroidery threads.
Use mild detergents whenever possible.
Air Dry Whenever You Can
High tumble dryer temperatures may gradually loosen the adhesive.
Air drying is the best way to preserve your patches.
If you must use a dryer, choose a low-heat setting.
Can You Re-Iron a Loose Patch?
Yes.
If you notice a corner lifting after several washes, you can usually reactivate the adhesive.
Simply:
- Place the garment on a flat surface.
- Cover the patch with parchment paper.
- Press firmly with a dry iron for 10–15 seconds.
- Allow it to cool completely.
If the patch still lifts after multiple attempts, sewing around the edge will provide a permanent solution.
How Long Do Iron-On Patches Last?
The lifespan of an iron-on patch depends on several factors:
- Quality of the adhesive
- Fabric type
- Frequency of washing
- Exposure to heat
- Daily wear
Premium patches applied correctly can last for many years.
Items worn daily such as work uniforms or school bags may experience more wear than decorative jackets or occasional-use garments.
When Should You Sew Instead?
Although iron-on patches are highly durable, stitching is recommended for:
- Sports uniforms
- Motorcycle clothing
- Heavy-duty workwear
- Children’s clothing
- Frequently washed garments
- Outdoor equipment
Combining heat application with stitching provides maximum security.
Creative Ways to Use Iron-On Patches
Iron-on patches aren’t just for repairing clothing they’re also a fantastic way to express your style or promote your brand.
Here are some creative ideas:
Refresh Old Denim
Give an old denim jacket or pair of jeans a fresh look with embroidered patches that reflect your personality.
Personalise Everyday Bags
Add e to backpacks, tote bags, or laptop sleeves to create a one-of-a-kind accessory.
Upgrade Workwear
Display your company logo on uniforms, aprons, or jackets for a professional appearance.
Celebrate Achievements
Commemorate sports events, school accomplishments, clubs, or organisations with personalised badges.
Create Memorable Gifts
Design custom patches for birthdays, family reunions, weddings, or special events to create meaningful keepsakes.
Why Choose Custom Patch Makers UK?
Finding the right patch manufacturer is just as important as applying the patch correctly.
At Custom Patch Makers UK, we specialise in creating premium-quality custom patches tailored to businesses, clothing brands, sports teams, schools, clubs, and individuals across the UK.
Our collection includes:
- Custom Iron-On Patches
- Embroidered Patches
- Woven Patches
- PVC Rubber Patches
- Chenille Patches
- Leather Patches
- Velcro Patches
- Printed Patches
- Name Patches
- Uniform Patches
- Hat Patches
- Jacket Patches
Every patch is produced with attention to detail, vibrant colours, durable stitching, and reliable backing options to ensure outstanding results.
Whether you need a single personalised design or a bulk order for your organisation, our experienced team is committed to delivering patches that combine quality, durability, and style.
Frequently Asked Questions
Can I apply an iron-on patch to synthetic fabric?
Yes, but only if the fabric can tolerate moderate heat. Always check the care label and use a lower temperature for polyester or blended materials.
Can I iron a patch onto a backpack?
Yes, provided the backpack is made from heat-resistant materials such as canvas or cotton. Nylon and waterproof fabrics should generally be avoided.
How long should I wait before washing a patched garment?
It’s best to wait at least 24 to 48 hours after application before washing to allow the adhesive to cure completely.
Why are the edges of my patch lifting?
This usually happens because the patch didn’t receive enough heat or pressure during application. Reapply dry heat while pressing firmly, paying particular attention to the edges.
Is it safe to tumble dry clothing with iron-on patches?
Air drying is recommended. If you need to use a tumble dryer, choose a low-heat setting to minimise stress on the adhesive.
Can I remove an iron-on patch?
Yes. Applying controlled heat can soften the adhesive, allowing the patch to be carefully peeled away. Any remaining residue can often be removed with a suitable adhesive remover, depending on the fabric.
Final Thoughts
Iron-on patches are one of the easiest and most affordable ways to personalise clothing, repair damaged garments, and showcase your creativity. With the right preparation, proper temperature, and careful application, you can achieve a professional-looking finish that lasts through everyday wear.
From denim jackets and backpacks to uniforms and hats, iron-on patches offer endless possibilities for customisation. By following the techniques outlined in this guide using the correct fabric, applying consistent heat and pressure, and caring for your patched garments you’ll enjoy durable results that stand the test of time.
If you’re looking for premium-quality custom patches made to your exact specifications, Custom Patch Makers UK is here to help. Whether you need custom iron-on patches for your business, organisation, fashion brand, or personal project, we provide expertly crafted patches designed for long-lasting performance and exceptional style.